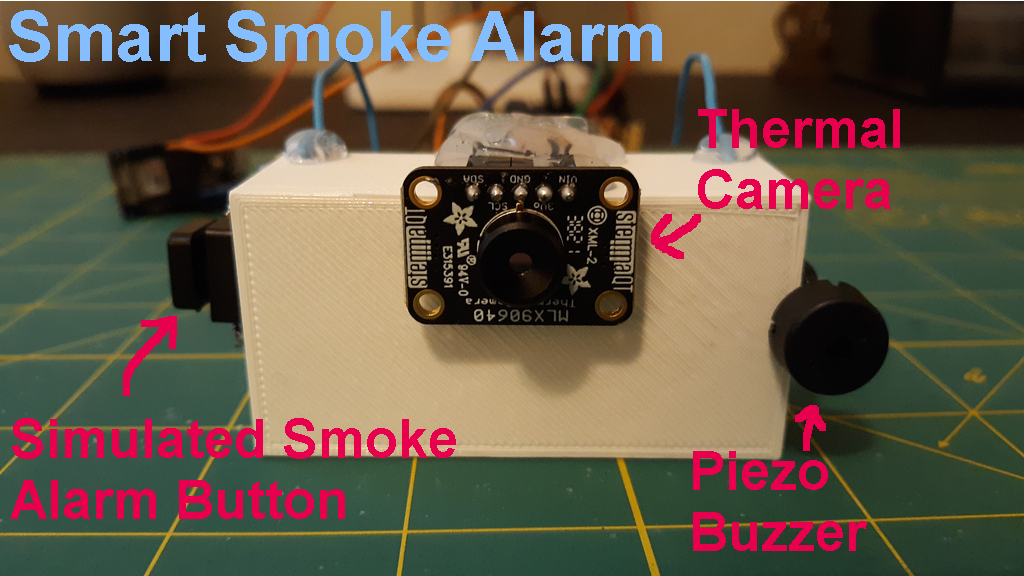
| description |
|---|
A WiFi-connected smart smoke alarm system that incorporates an Adafruit IR thermal camera to detect the presence of people in a building. |
Created By: Nick Bild
Public Project Link: https://studio.edgeimpulse.com/public/142241/latest
{% embed url="https://www.youtube.com/watch?v=IZDHoQUmEg8" %}
Thousands of people die each year in fires in both residential and commercial settings. Offices, warehouses, industrial, and manufacturing plants account for well over 1,000 fire-related injuries in the US annually. First responders work hard to rescue individuals that are either trapped in or incapacitated by a building fire, but without knowing where to look, they may not find them in time.
Smart Smoke Alarm attempts to solve this problem by providing firefighters with precise information about the locations of persons trapped inside a burning building. This device uses a thermal camera and a machine learning classifier to identify people in the event that the smoke detector is tripped. By using thermal imaging, it is possible to recognize people in the dark and through smoke. Location information is wirelessly transmitted to a remote server where it could be viewed by first responders on the scene to help them focus their efforts.
- 1 x Adafruit MLX90640 24x32 IR Thermal Camera (110 Degree FoV)
- 1 x Adafruit Feather M4 Express
- 1 x Arduino Nano 33 IoT
- 1 x 350 mAh or greater LiPo battery
- 1 x Piezo buzzer
- 1 x Push button
- 1 x 10K ohm resistor
- 1 x 3D printed case (optional)
- Edge Impulse Studio
- Arduino IDE
There are two development boards — an Arduino Nano 33 IoT and an Adafruit Feather M4 Express. The Feather M4 Express handles capturing measurements from the thermal camera and provides the processing power to run the machine learning algorithm that was developed with Edge Impulse. The Nano 33 IoT provides WiFi for wireless communications, and also serves as a simulated smoke detector.
Since smoke detection is already a solved problem, and I didn't want to have to start a fire to test my device, I simulated this function with a push button on the side of the case. Pressing this button starts a simulated smoke alarm which turns on an audible alert using a piezo buzzer. This also triggers the thermal camera to start capturing data and passing it to a neural network classifier that was trained to detect people by their heat signatures. If a person is detected during an active alarm, that fact is communicated to a remote web API via WiFi. The API records the location and timestamp in a database that could be used to identify where rescue efforts should be focused.
The hardware was placed in a 3D printed case that was mounted near the ceiling where it has a good view of the entire room.
An Arduino sketch was created to capture thermal images to train the neural network. I captured measurements for two classes — person and empty room. For the person class, I took many images of myself standing, sitting, walking, and otherwise moving about the room. The empty room class is self-explanatory. In total, I collected 189 'person' images, and 130 'empty' images. These measurements were processed with a simple Python script that formatted the data as CSV files, then they were uploaded to my Edge Impulse project using the data acquisition tool.
To give a better idea of what the thermal camera "sees," I wrote another Arduino sketch that converts the measurements into RGB values, which are then transformed into PNG images with this script. A few examples follow.
Building the model turned out to be the simplest part of the entire project. I created a new impulse that forwards the raw thermal image data into a neural network classification block. I kept the default model design and hyperparameters and clicked the "Start training" button. Surprisingly, the classification accuracy was reported as being at 100% right off the bat.
That sounded too good to be true, so I used the model testing tool as a secondary validation that uses 20% of the uploaded data that was not included in the training process. That showed an average classification accuracy of 96.88%, confirming that the model is working very well. There is really no need to improve on this for a proof of concept, so I moved on to loading this model onto my hardware.
Edge Impulse offers many options for deployment, but in my case the best option was the "Arduino library" download. This packaged up the entire classification pipeline as a compressed archive that I could import into Arduino IDE, then modify as needed to add my own logic (like to communicate with the Nano 33 IoT to send messages over WiFi, for example). That sketch can be found here. And the sketch that runs the simulated smoke detector on the Nano 33 IoT can be found here.
This device worked surprisingly well in my real world testing. In dozens of tests I didn't have a single false positive or false negative. While my testing was done in my relatively small home office, I expect this method would scale up to cover a large office space, factory floor, or warehouse with similar accuracy. To cover a larger area a higher resolution thermal camera would be needed, however. Feel free to have a look around my public Edge Impulse project if you want to experiment with this idea yourself. Even if you don't have the same hardware, it would be pretty trivial to deploy it to alternate platforms.


