-
Notifications
You must be signed in to change notification settings - Fork 11
Home
Here's a quick crash course on everything Glimmer is capable of.
Before getting started with Glimmer, it is important to note that she supports more than one canvas, and all of her canvas-related commands work for any one of them depending on which one you ask for.
When using a canvas-related command, you can supply it with a canvas as an argument. Use one of the following arguments to use the respective canvases:
-
pixelcanvasorpcfor Pixelcanvas.io -
pixelzioorpzifor Pixelz.io -
pixelzoneorpzfor Pixelzone.io -
pxlsspaceorpsfor Pxls.space
Since guilds are likely to be most interested in only one canvas at a time, a default canvas can be set as a convenience. Glimmer will automatically assume the default canvas is to be used any time a command that accepts a canvas as an argument is not given one. This works for all commands that take a canvas as an argument.
When Glimmer first joins your guild, the default canvas will be set to Pixelcanvas.io. Use g!canvas to change it to whichever site your guild will be using most.
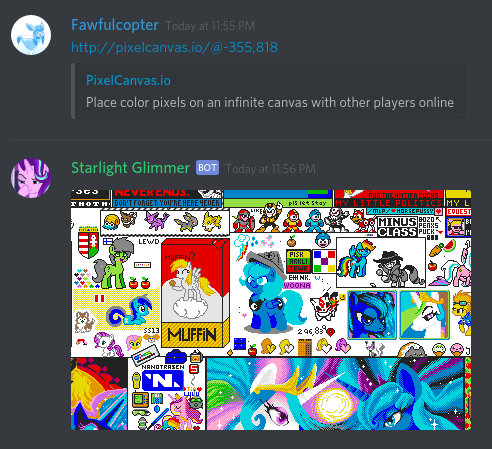
Right out of the box, Glimmer will listen for any posts that contain a URL to some canvas, and take action if she finds one. This automatic listening behavior is called Autoscan. Autoscan will work for URLs to any supported canvas, and will work no matter where in the message the URL is found.
If only a URL is contained in a message, Glimmer will use it to form a preview of the canvas at the location the URL points to. She will also render an automatic preview of the default canvas if the message contains any coordinate pairs in the format of @x,y. If the URL is a Pixelzone.io or Pxls.space URL and the URL has a zoom factor in it, the canvas will also be zoomed to that amount. See the Preview command further down for more info about how previews work.

If the message contains a coordinate pair of the form x,y and has a PNG attachment, Glimmer will use the attachment to create a diff at the specified coordinates using the default canvas. See the Diff command further down for more info about how diffs work. If the coordinate pair is of the form @x,y instead of just x,y, preview will take precedence over the diff.

Autoscan is enabled by default. If you find this feature annoying and would rather Glimmer only create previews and diffs when the explicit versions of the commands are called, you can disable Autoscan by using g!autoscan.
Glimmer has the ability to be translated into any language, though only a few are available. You can use g!language to see which language localizations are available and to set one for your guild. If the langauge you want isn't listed, consider looking at the file en-US.py in this repo and submitting your own translation!
By default, all of Glimmer's commands start with a command prefix. By default, the command prefix is g!. You can use the command g!prefix to change this prefix to anything you want for your guild, as long as it is between 1 and 5 characters.
If you want to be notified every time Glimmer updates to be aware of new features, bugfixes, and syntax changes, you can use g!alertchannel to set a channel for Glimmer to post update alerts to. By default, this has nothing set. Once you set this, Glimmer will automatically post to the channel whenever she changes version number with a link to this repo's releases page.
Glimmer's primary feature is the simple canvas preview. You can use it to share live snippets of a canvas without needing to screenshot it yourself.
To use the preview command, use g!preview (or g!p for short) along with the canvas and comma-separated coordinates on where the center of the preview should be.

If what you're looking at is rather tiny, you can zoom-in the preview by adding a zoom factor in the form of #zoom to the end of the command. Using a zoom factor of 2 will double the size of the image, a zoom factor of 3 will triple it, and so on. The maximum zoom factor is 16.

A zoom factor can also be added to the ends of URLs or coordinate pairs that trigger Autoscan.
When it comes to building great things one pixel at a time with many people, coordination is key. And sometimes, getting everyone on the same page trying to build from a template can be a messy affair. Pixels are miscounted, someone uses the wrong shade of grey, some bits can even become forgotten. And sometimes an evil person can come along and grief your work! How do you keep track of what part of your template is done and what isn't? Enter the diff command.
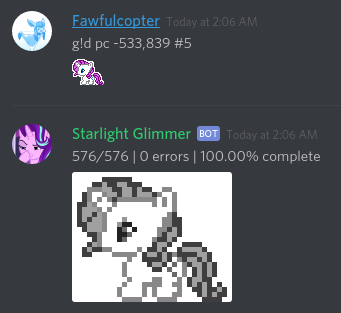
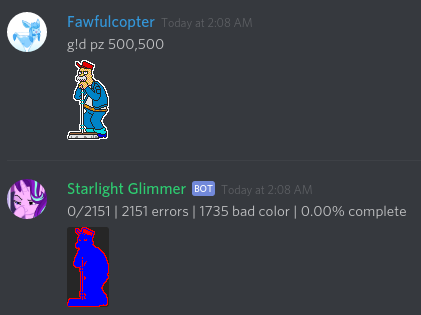
Diff allows you to upload a template image along with its coordinates of where it should be on the canvas, and Glimmer will determine how much of that template is finished. She'll tell you how many pixels there are, how many of them are correct, how many aren't, and what the completion percentage is. She'll also send a preview of the template with all the incorrect pixels marked in red so you know which ones need fixing.
To use diff, use g!diff (or g!d for short) along with the canvas, comma-separated coordinates of the template's top left corner, and uploading a PNG of the template to check in the same message.

Like preview, diff can also accept an optional zoom factor to zoom in the result of the diff, which is useful if the template you're trying to diff is very small. This zoom will only work if the template is smaller than 200x200, and the zoom will never create an image larger than 400x400. If either of these caps are surpassed, the zoom factor will simply be ignored.

Zoom factors can also be added to coordinate pairs that trigger diff autoscans.
Diff will only accept images in the PNG format. No JPGs, GIFs, or any other weird image formats will be accepted. Transparent pixels in the template will be ignored from the completion count; however, do note that the coordinates argument will always refer to the top left pixel of the image you send, even if those pixels are transparent.
Diff expects all pixels in the image to have only colors that exactly match the colors present on whatever canvas you are using. This is to eliminate ambiguity. If your image contains colors that don't match the palette of the canvas, or if those colors aren't completely opaque, Glimmer will mark them as "bad color" in the diff and mark them in blue.

You can use the next command to fix an image that has bad colors:
Quantize will take an image that you upload and force all pixels in it to align with the closest available color in a canvas's palette. This can be useful for quick-correcting templates that don't quite have the correct color pixels in them. You can also use it to lazily create a template from any image you want, but it will almost always turn out incredibly ugly.
To use quantize, use g!quantize (or g!q for short) along with a canvas and an uploaded template.

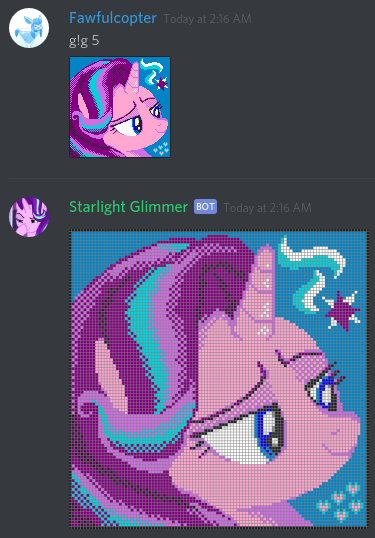
Gridify will simply add a grid to whatever template you want. This is useful for people who need grids applied to templates to make it easier to count individual pixels in patches where they are all the same color or of similar colors.
To use gridify, use g!gridify (or g!g for short) along with an optional pixel size. The pixel size will determine how many pixels wide and tall each individual pixel of the template should render compared to the grid lines, which will always be 1px thick.

Unfortunately, the pixel size is capped to save on performance and bandwidth. Similarly to the zoom factor for diffs, the pixel size for gridify will only have effect if the template is smaller than 500x500, and will never create an image larger than 1000x1000. If either of these caps are surpassed, the pixel size will be ignored and default to 1.
Ditherchart is an incredibly simple command that returns a chart detailing all the basic dithering combinations for a given canvas. If you don't know what dithering is, it's the interlacing of two different colors to create the illusion of a mixture of the two when seen from far away. Dithering can be useful if you're trying to create a template that needs a very specific color that a canvas doesn't offer a good substitute for. The charts supplied by the ditherchart command are intended to give you a quick at-a-glance look at what all the possible color combinations look like, so you can select the best option for your template.
To use ditherchart, use g!ditherchart along with a canvas.
Repeat can be very handy if you find yourself constantly previewing the same part of a canvas or diff-ing the same template over and over. What this command does is it looks back through the message history of a channel to find the last time a preview or diff was invoked, and it runs that command again. Use it to quickly update diffs or previews without having to re-type the full command.
To use repeat, simply use g!repeat (or g!r for short).

Repeat will only search for previews and diffs, and will only search back 50 messages. If no valid preview or diff is found in that range, repeat will fail and you will have to use preview or diff again manually.
Repeat will also repeat any preview or diff invoked via Autoscan.
Normally, animated guild emoji are only available to users who have a Discord Nitro subscription. However, they can be added to any guild whether the members with the Manage Emojis permission have Nitro or not. Additionally, bot users do not have any such limitations and can post any emoji they want. This gives rise to an interesting option -- if you don't have Nitro, Glimmer can listen for you attempting to use an animated emoji in some guild and use that emoji for you.
Admittedly this is a very hackish solution. Since Glimmer cannot edit the messages of other users, Glimmer will instead delete your message entirely and repost your message, except with the animated emoji rendered where it should be. Since this feature can be seen as undesireable to some (and entirely redundant for actual Nitro users) you need to opt-in to use it. To opt-in to this replacement feature, use g!register. Once registered, you will be opted-in to emoji replacement in any guild Glimmer happens to be in. Use the command again to opt back out.
This feature also requires that Glimmer have the Manage Messages permission in your guild. This is not granted to Glimmer by default through the standard invite link, so your guild admin must grant this permission to Glimmer before emoji replacement can be used.
Another interesting thing about bots is that, like Nitro users, they can post any emoji from any guild they are in to any other guild. This presents another interesting opportunity -- you can use Glimmer to "steal" emojis from other guilds Glimmer is a part of! Simply type the emoji code for an emoji in another guild and Glimmer will use emoji replacement to render that emoji for you, even if you are not in that other guild at all.
Since sharing emoji in this way can be a privacy concern for some guilds that do not want to share or otherwise do not want to be seen, your guild admin must also opt-in the entire guild to this feature. Your guild must be opted-in to use emoji from any other guild, and opting-in will also mean your emoji will become available to all other guilds. You do not need to opt-in your guild to use your own guild's emoji, though. Your guild admin can opt in with g!registerguild and similarly opt back out by using the same command again.
Once opted-in, you can use g!listemotes to see a list of all the emoji that Glimmer will listen for. This will always include your own guild's emoji, plus all other opted-in guilds' emojis if your guild is also opted-in to emoji sharing.