AI is in the palm of your hands

Large Language Models (LLMs) like OpenAI’s ChatGPT typically require a CUDA-capable GPU or an Apple Silicon Mac with substantial memory to run locally. However, in recent years, edge LLM modules designed for embedded microcontrollers have emerged.
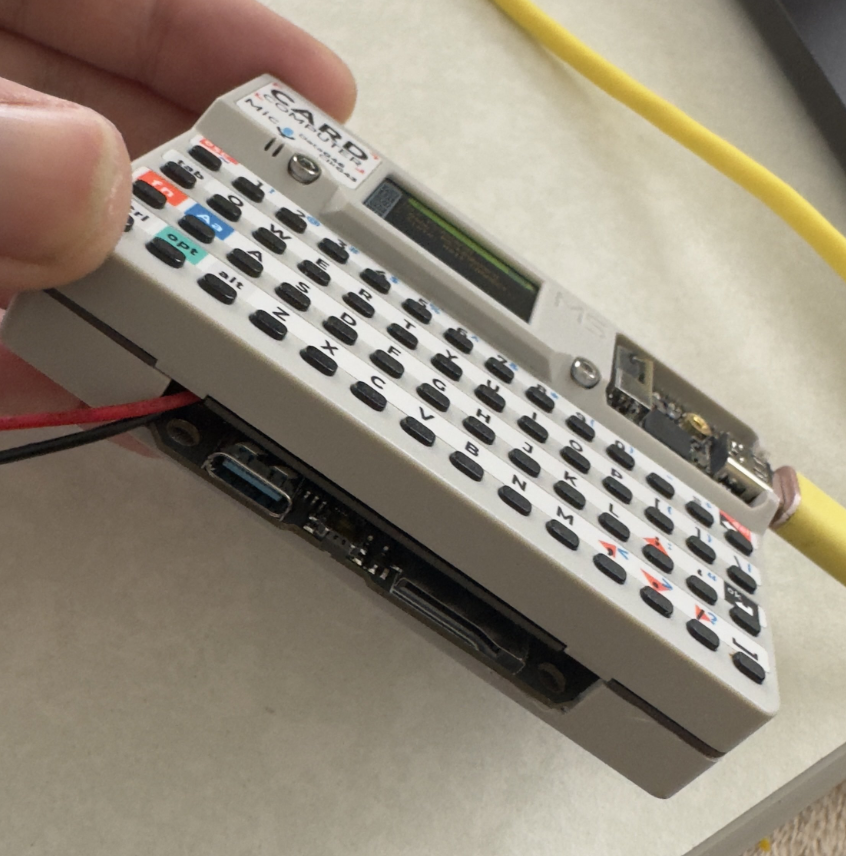
In this article, we’ll explore how to combine M5Stack’s credit card-sized computer with a keyboard, Cardputer, and a ModuleLLM capable of running local LLMs. Together, they enable a "palm-sized device running a local LLM."
↓ Demonstration
https://x.com/GOROman/status/1883032143884103767
First, get the ModuleLLM (LLM module). It’s currently sold out at the official distributor, Switch Science, and M5Stack’s official store. I managed to snag the last one from Aliexpress. Production might resume after the Lunar New Year, so stock could return around March. Alternatively, you might find someone who bought it impulsively but doesn’t know how to use it and persuade them to sell it.
Next, get a Cardputer. Fortunately, its stock recently replenished.
Remove the ModuleLLM from its frame by unscrewing the four screws with a wrench. Disassemble the Cardputer as well. Be careful when detaching the large battery stuck with double-sided tape. Avoid bending it, as this could cause it to ignite. Remove the black component on top of the Cardputer too.

Modify the Cardputer’s case to fit the ModuleLLM snugly by trimming and sanding as needed.
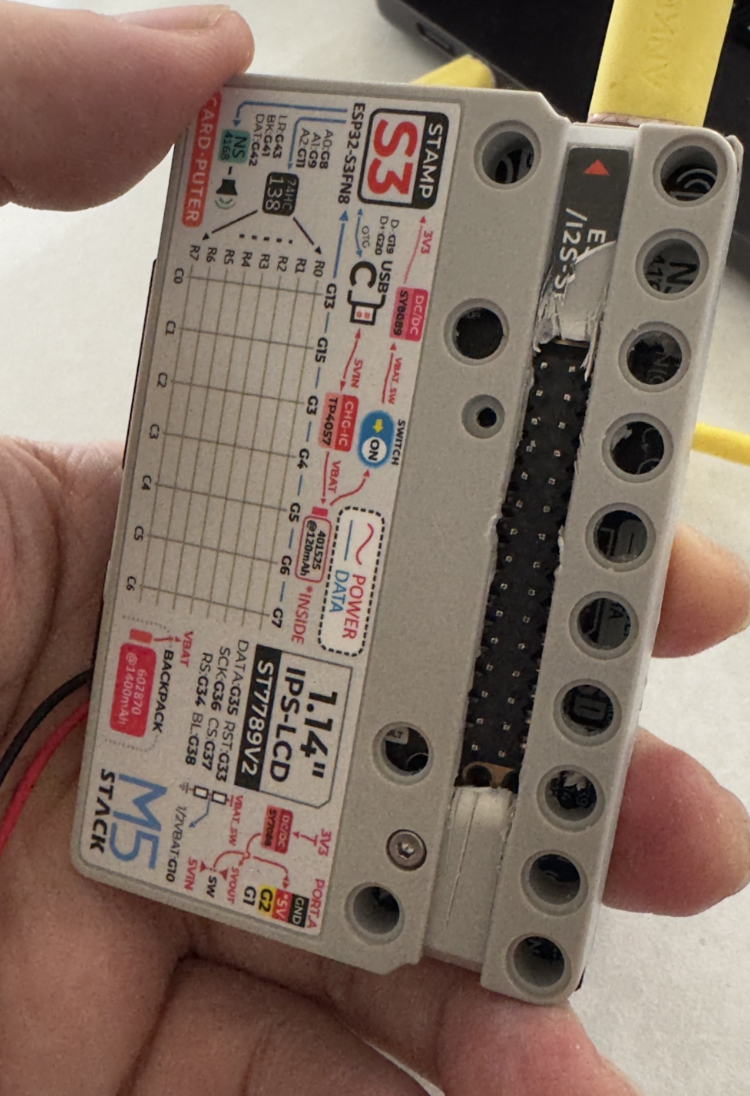
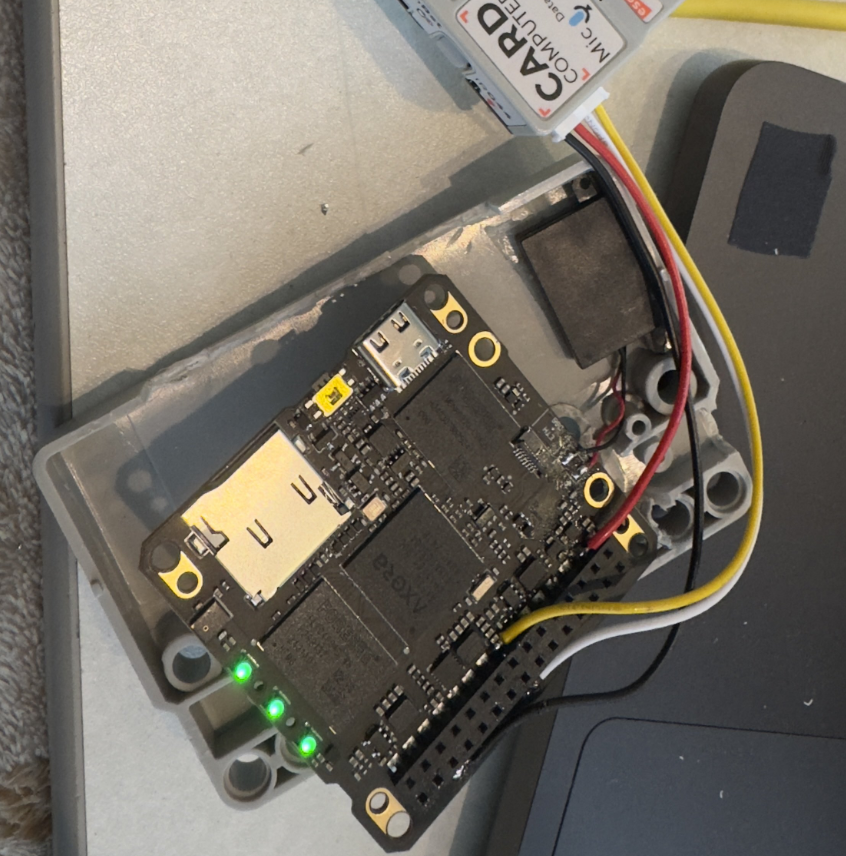
Cut out a section at the back of the case to expose the M.BUS pins. To prevent short circuits, insulate the pins with Kapton or acetate tape.
You can communicate with ModuleLLM via UART or TCP (port 10001). For this guide, we’ll use UART.
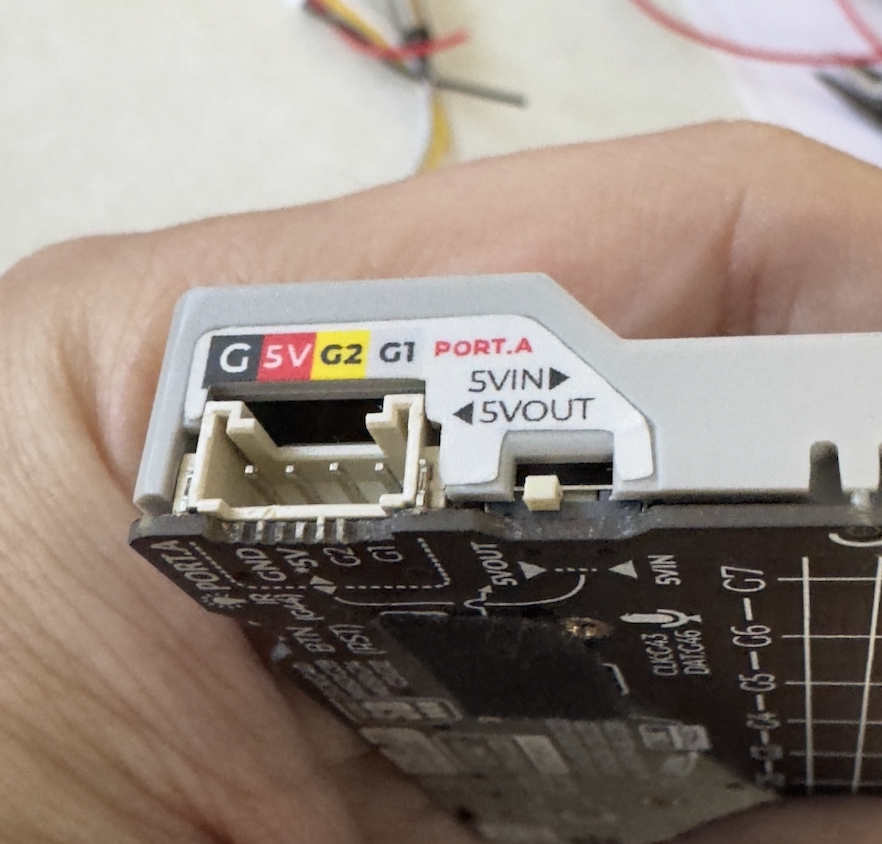
Connect the ModuleLLM to the Cardputer as follows:
- Cardputer GROVE terminal (G1, G2, +5V, GND)
- ModuleLLM UART pins (+5V, GND)
While soldering directly to the board worked for this project, there may be better ways to connect them.
| Cardputer GROVE | ModuleLLM M.BUS |
|---|---|
| G (Black) | GND |
| 5V (Red) | 5V |
| G1 (Yellow) | UART (Tx) |
| G2 (White) | UART (Rx) |
- PlatformIO
- Arduino M5Stack Board Manager v2.0.7
- PlatformIOをインストール
- プロジェクトをクローン
git clone https://github.com/GOROman/LLMCardputer.git- 依存ライブラリをインストール
pio pkg install- ビルドとアップロード
pio run -t upload- M5CardputerにM5Module-LLMを接続
- 電源を入れると起動アニメーションが表示され、LLMの初期化が行われます
- キーボードから質問を入力し、Enterキーで送信
- LLMが回答を生成し、テキストで応答します
src/config.h で以下の設定が可能です:
FONTNAME: 日本語表示に対応したLGFXJapanGothicフォントを使用(デフォルト: fonts::lgfxJapanGothic_24)
MODULE_LLM_UART_RX: UART受信ピン(デフォルト: 2)MODULE_LLM_UART_TX: UART送信ピン(デフォルト: 1)- M5Cardputerの Serial2 を使用してM5Module-LLMと通信
SOUND_VOLUME: スピーカーの音量(0-255の範囲、0: 無音, 255: 最大音量) デフォルト: 100
MODEL: 使用するLLMモデルを指定(デフォルト: NULL)- NULL: デフォルトモデルを使用
- 利用可能なモデル:
- qwen2.5-0.5B-prefill-20e: 小規模な高速モデル
- qwen2.5-1.5b-ax630c: 中規模な汎用モデル
- deepseek-r1-1.5B-ax630c: DeepSeekベースの高性能モデル
MIT License
- サウンド機能: らびやん