-
Notifications
You must be signed in to change notification settings - Fork 0
Setup analysis script on Windows
This guide expects that you are using Slic3r, but it should also work with other slicers.
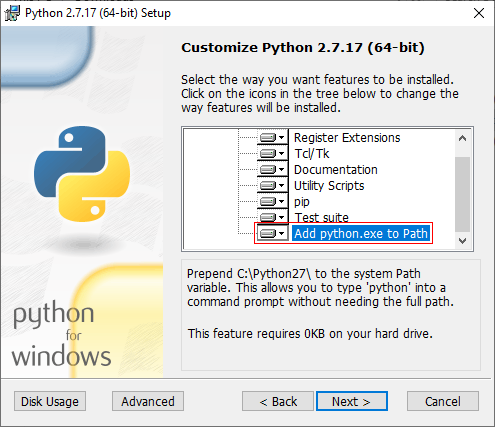
Download latest Python 2.7 version from here. During the installation make sure to select "Add python.exe to Path".

Now open a command prompt (Win + R), type in cmd and press enter.
> mkdir %APPDATA%\Slic3r\scripts\gcode_metadata
> cd %APPDATA%\Slic3r\scripts\gcode_metadata
In the the next step download and extract the script. Then move the analysis folder to the above created directory C:\Users\MyUser\AppData\Roaming\Slic3r\scripts\gcode_metadata.
Go back to the command prompt.
> cd analysis
> pip install virtualenv
> virtualenv venv
> venv\Scripts\activate.bat
> python setup.py install
If you get the error "certificate verify failed" run pip install certifi and try again.
> analysis --help
Usage: analysis [OPTIONS] PATH

Options:
  --speed-x FLOAT
  --speed-y FLOAT
  --offset <FLOAT FLOAT>...
  --max-t INTEGER
  --g90-extruder
  --help                     Show this message and exit.
You can easily integrate the analysis script in your workflow with slic3r. Simply add the absolute path of the script under the post-processing scripts option.

If you want to supply arguments, e.g. --g90-extruder, you need to write a wrapper script. I placed mine under %APPDATA%\Slic3r\scripts\gcode_metadata\generate_octoprint_metadata.bat, see screenshot above.
@echo off
rem Wrapper script for additional arguments
%APPDATA%\Slic3r\scripts\gcode_metadata\analysis\venv\Scripts\analysis.exe --g90-extruder "%*"