-
Notifications
You must be signed in to change notification settings - Fork 28
Getting Started Guide
-
Download the latest version of the SDK from GitHub or clone the repository directly by executing
git clone https://github.com/Adonit/Adonit-iOS-SDK.gitfrom the command line.
-
Open your project in Xcode
-
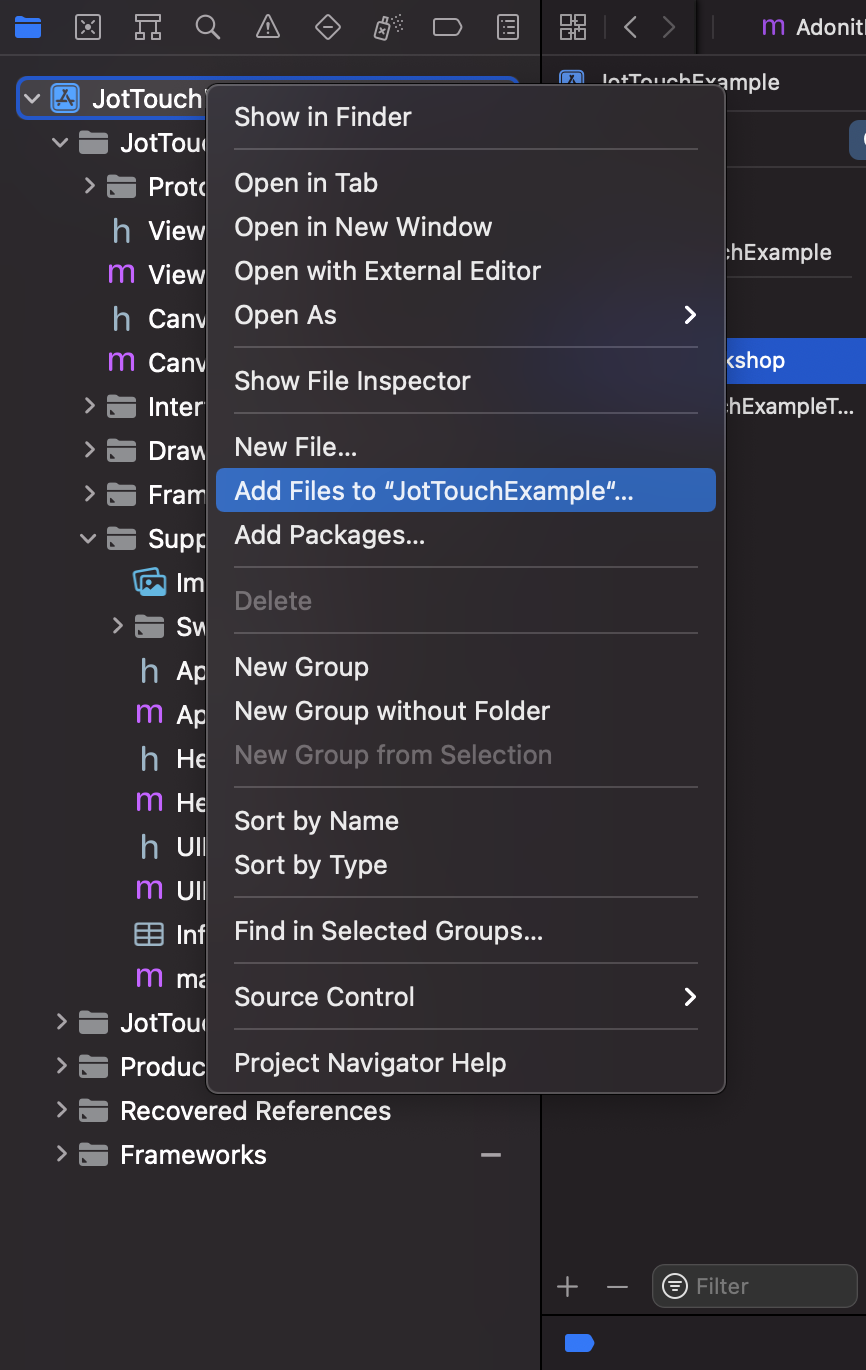
Select your Project in the Project Navigator and then choose Add Files to…
-
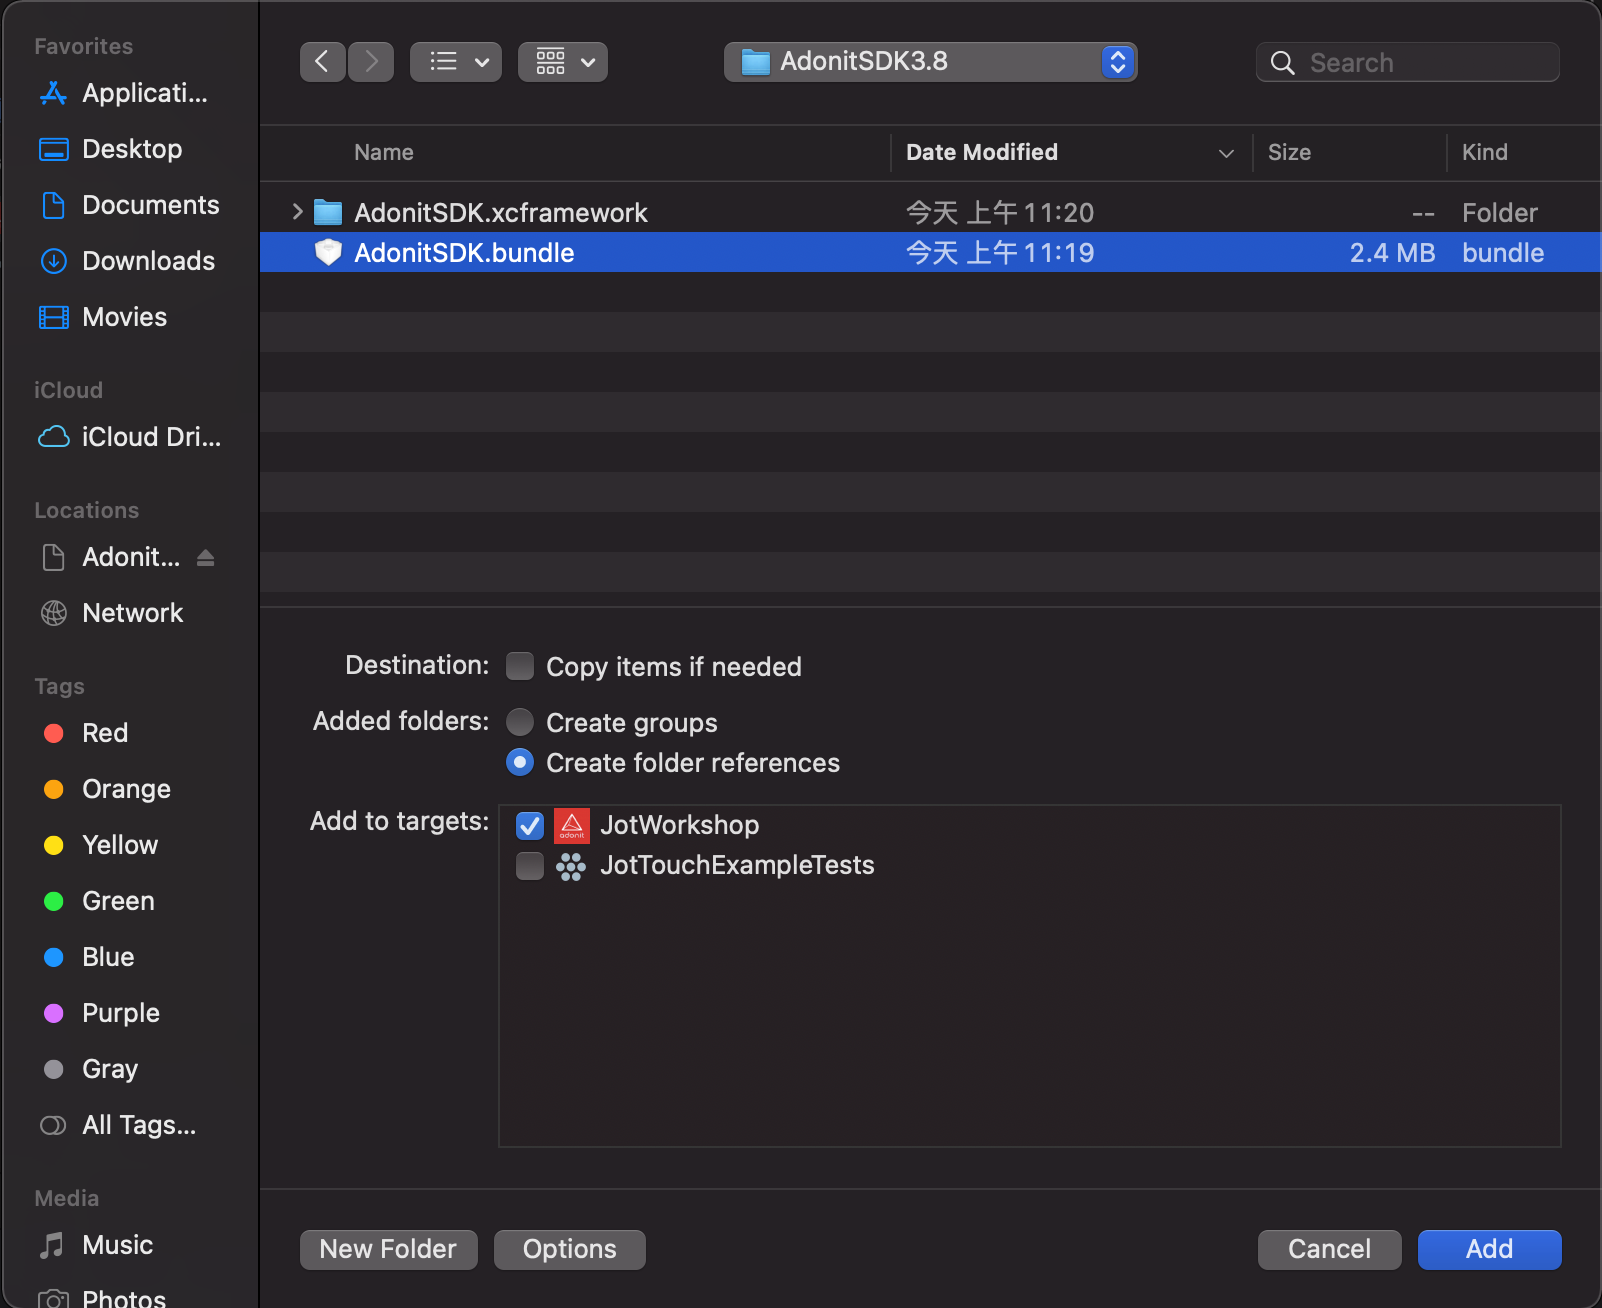
Select the SDK's Framework. Make sure Copy Items if needed is checked. Then click Add.
-
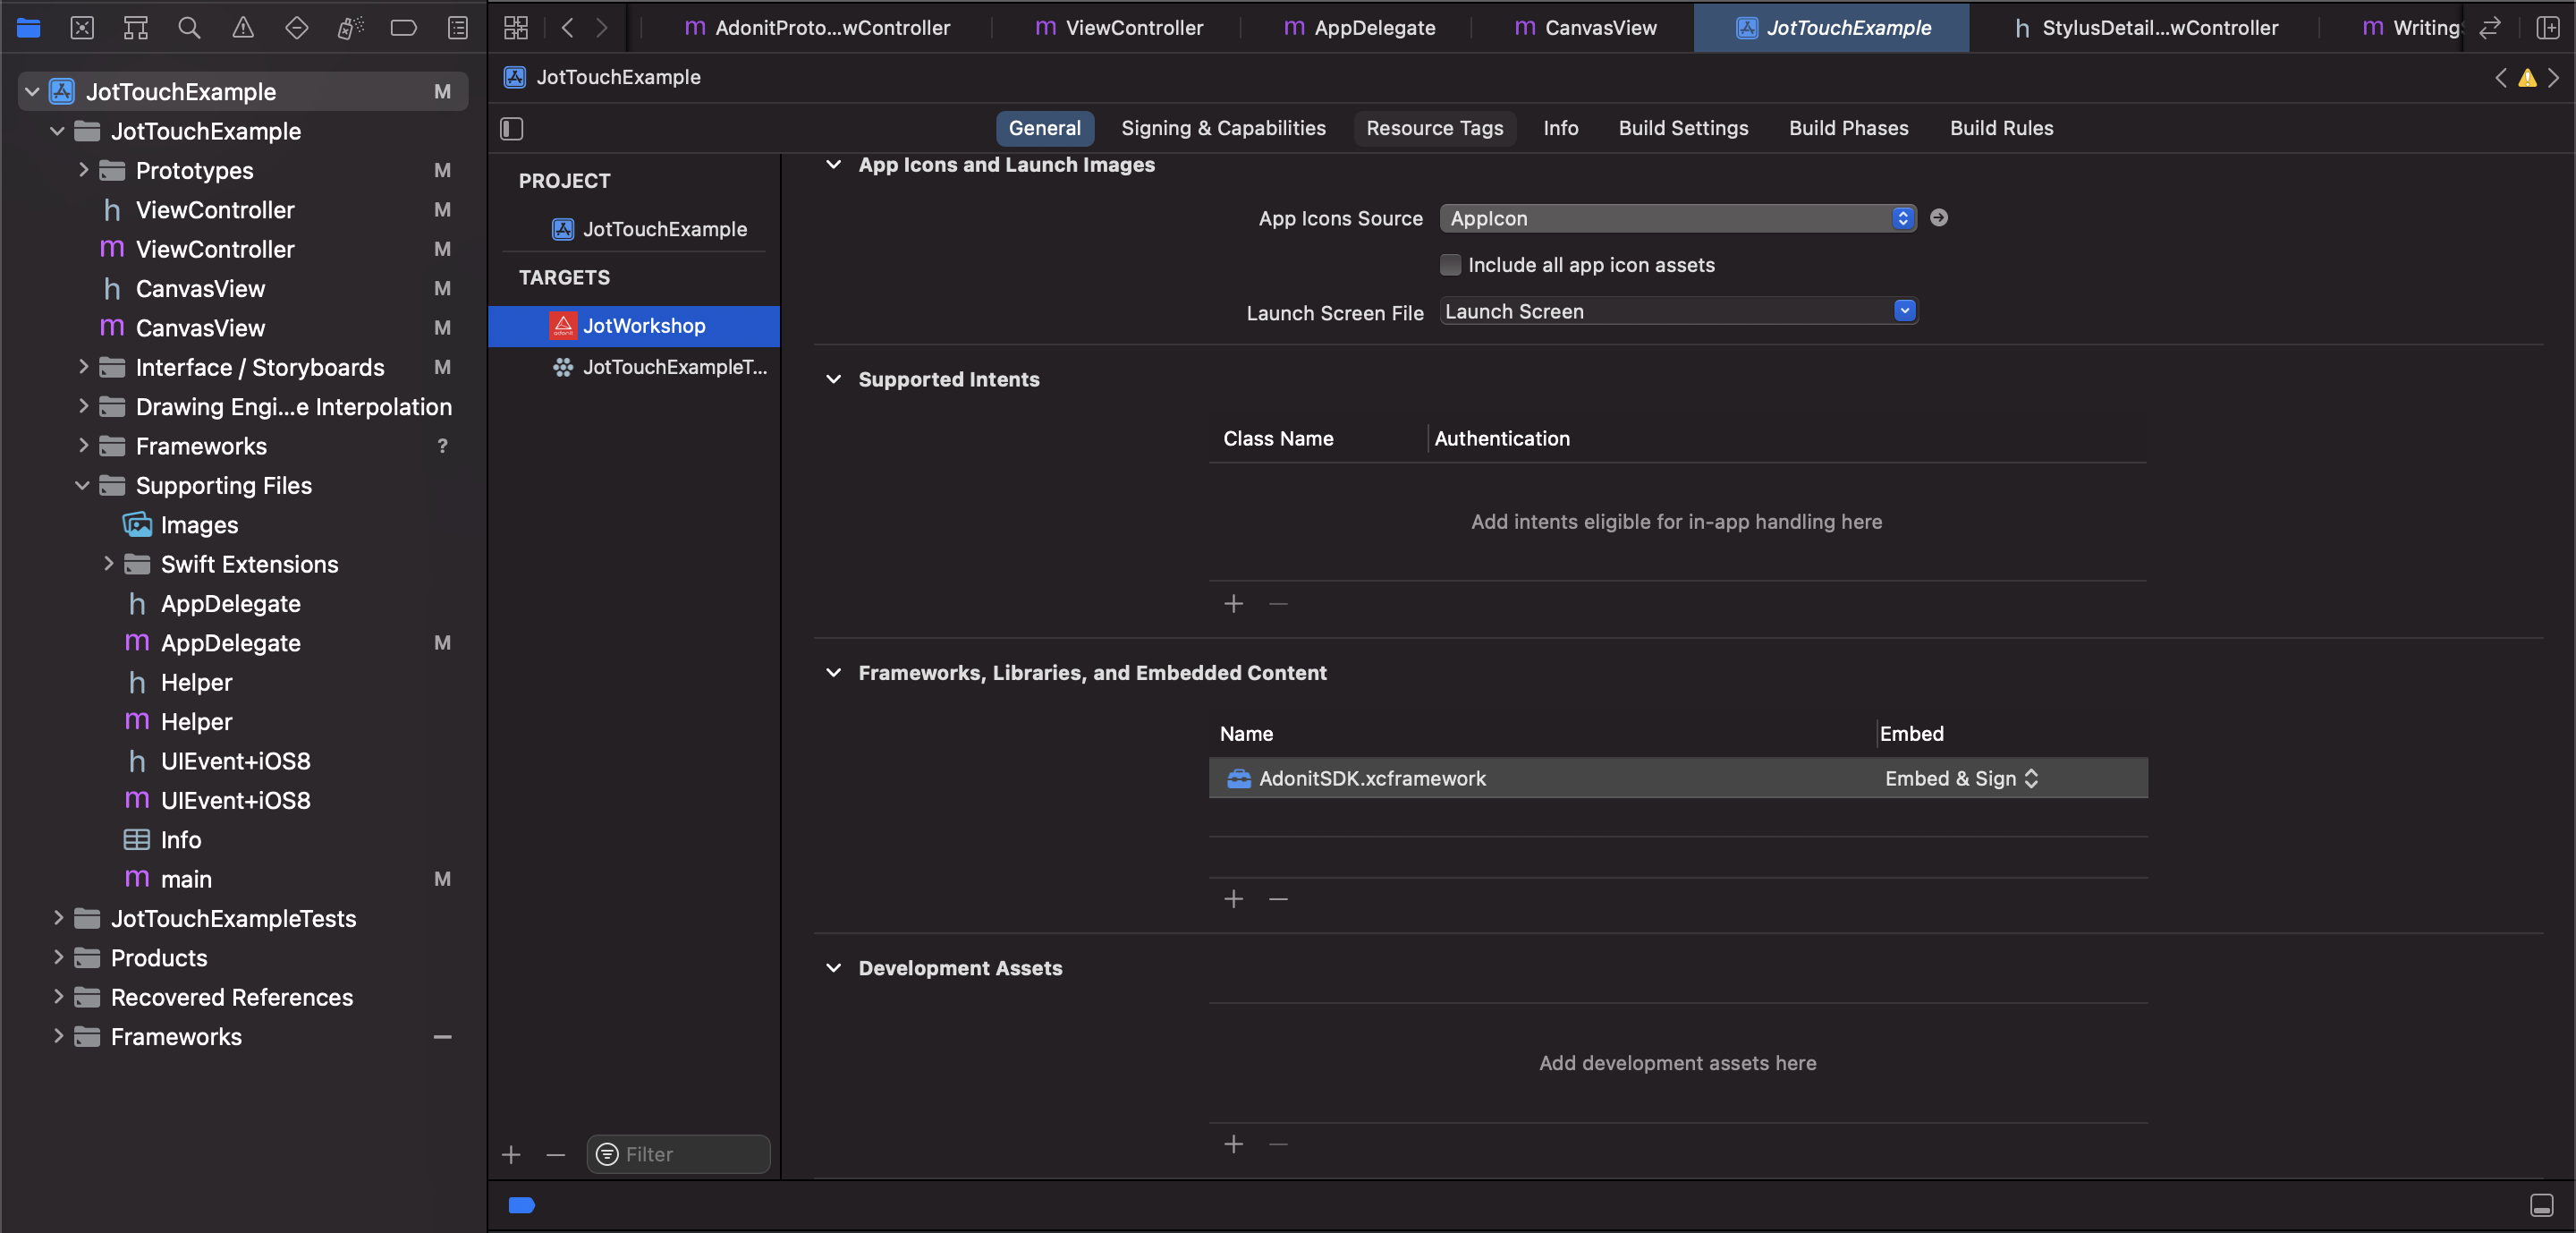
The SDK should now appear in the list of Linked Frameworks and Libraries
-
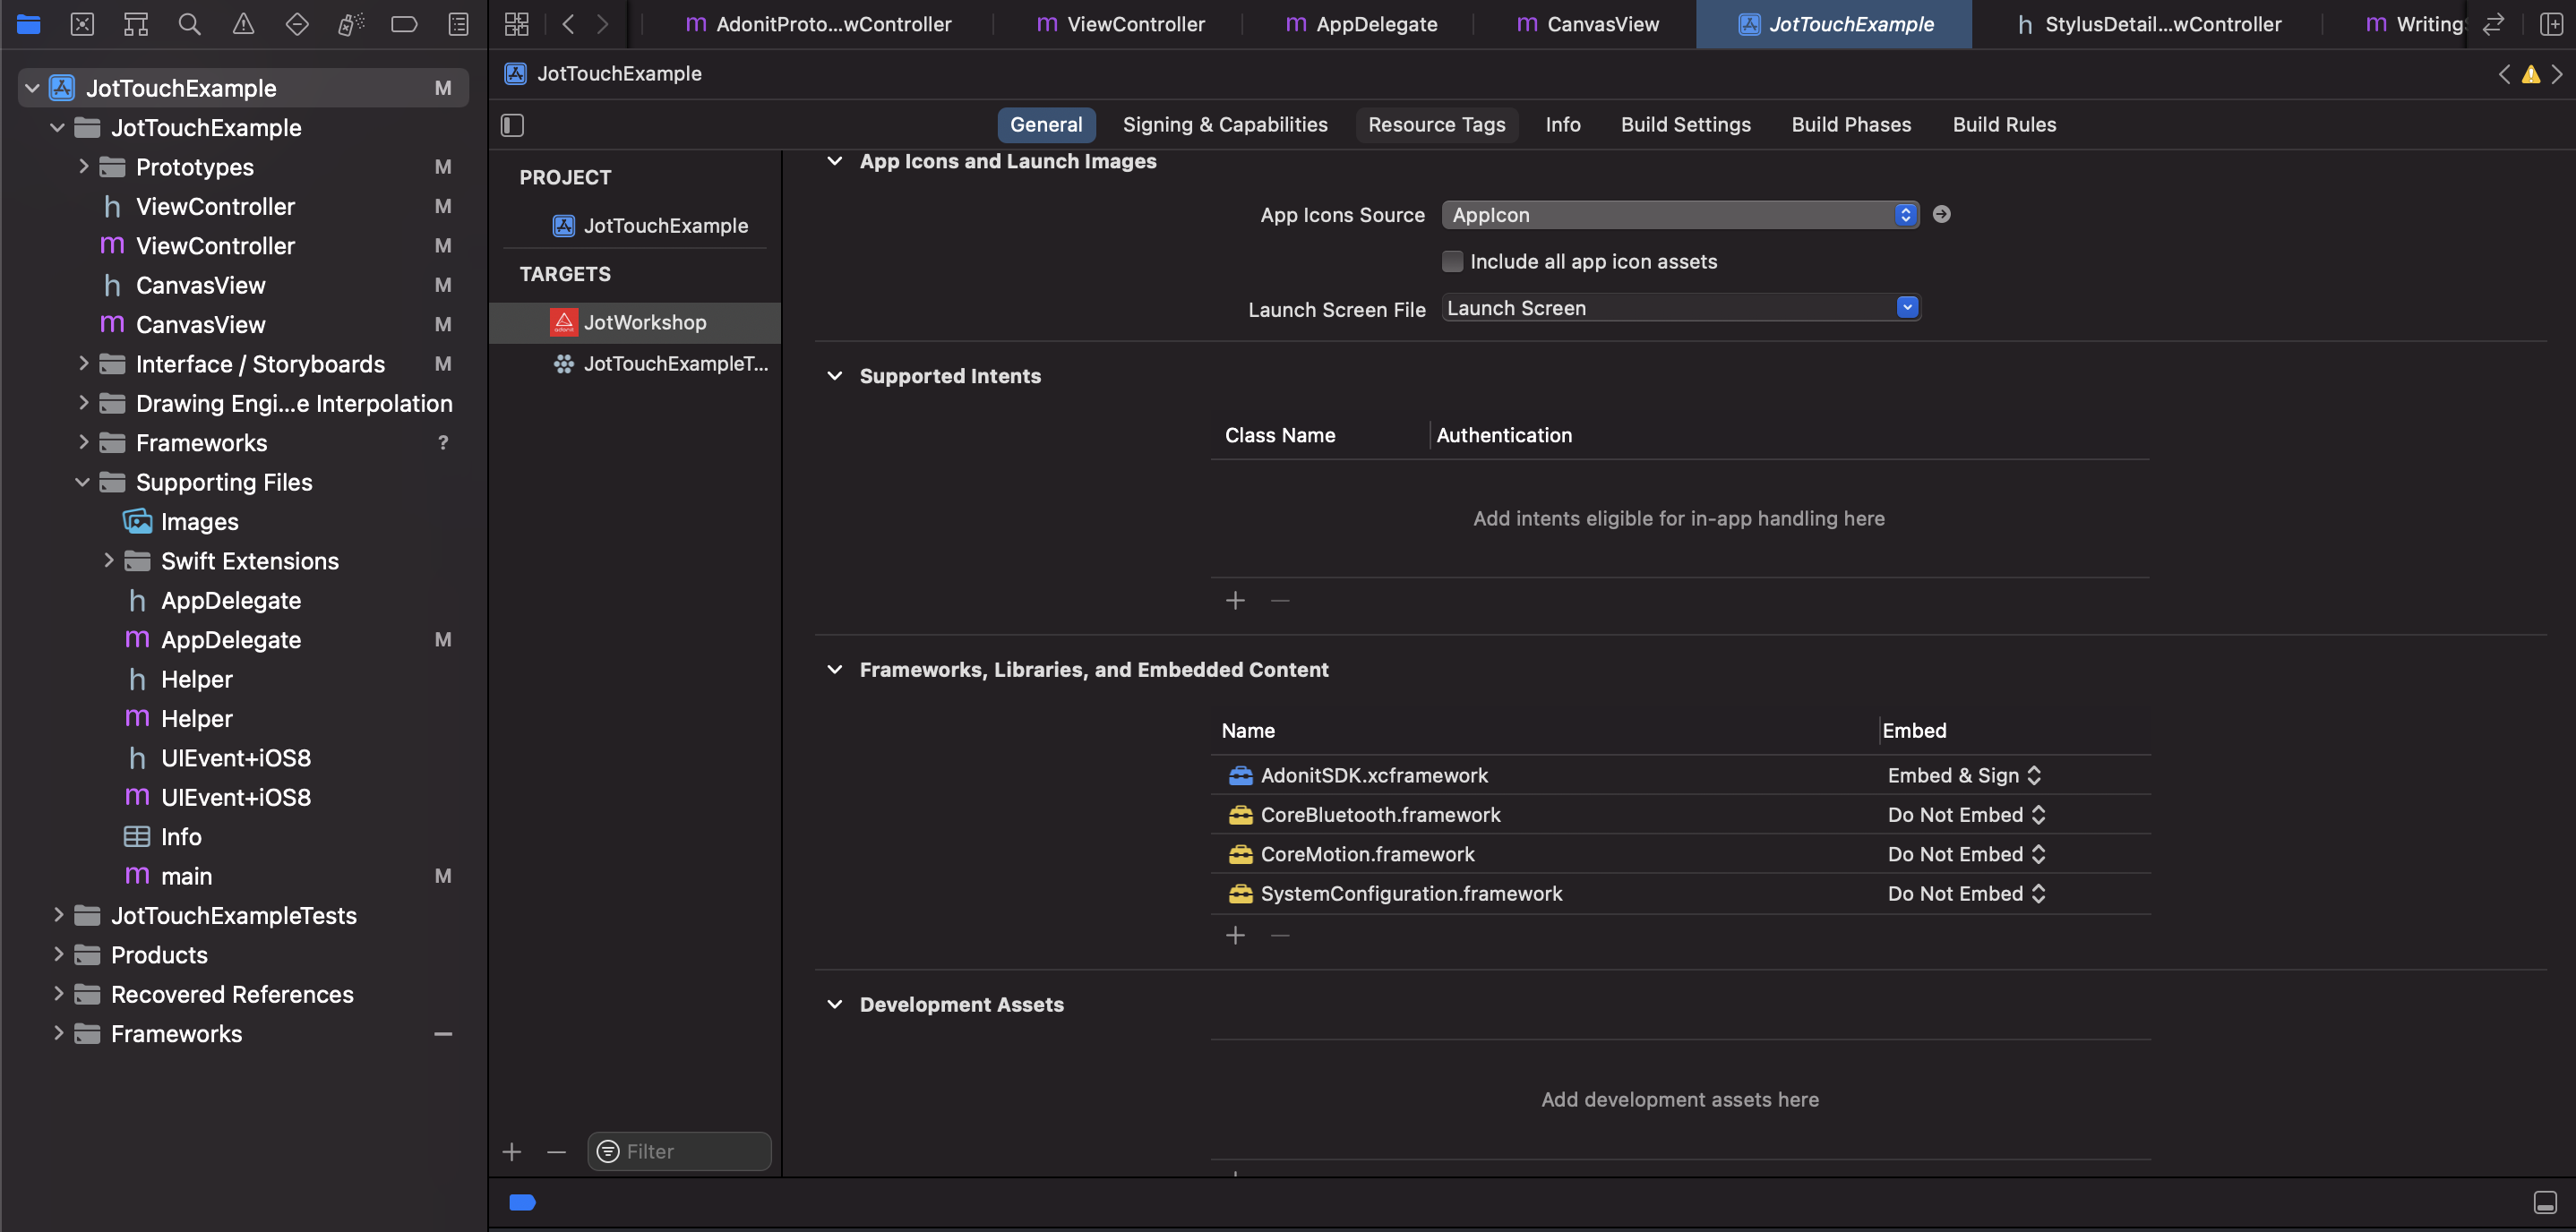
The SDK also requires three other iOS frameworks
- CoreMotion
- CoreBluetooth
- SystemConfiguration
Press the + button underneath the list of frameworks, and add these additional frameworks. After you are done, your list of Linked Frameworks should resemble the following.
-
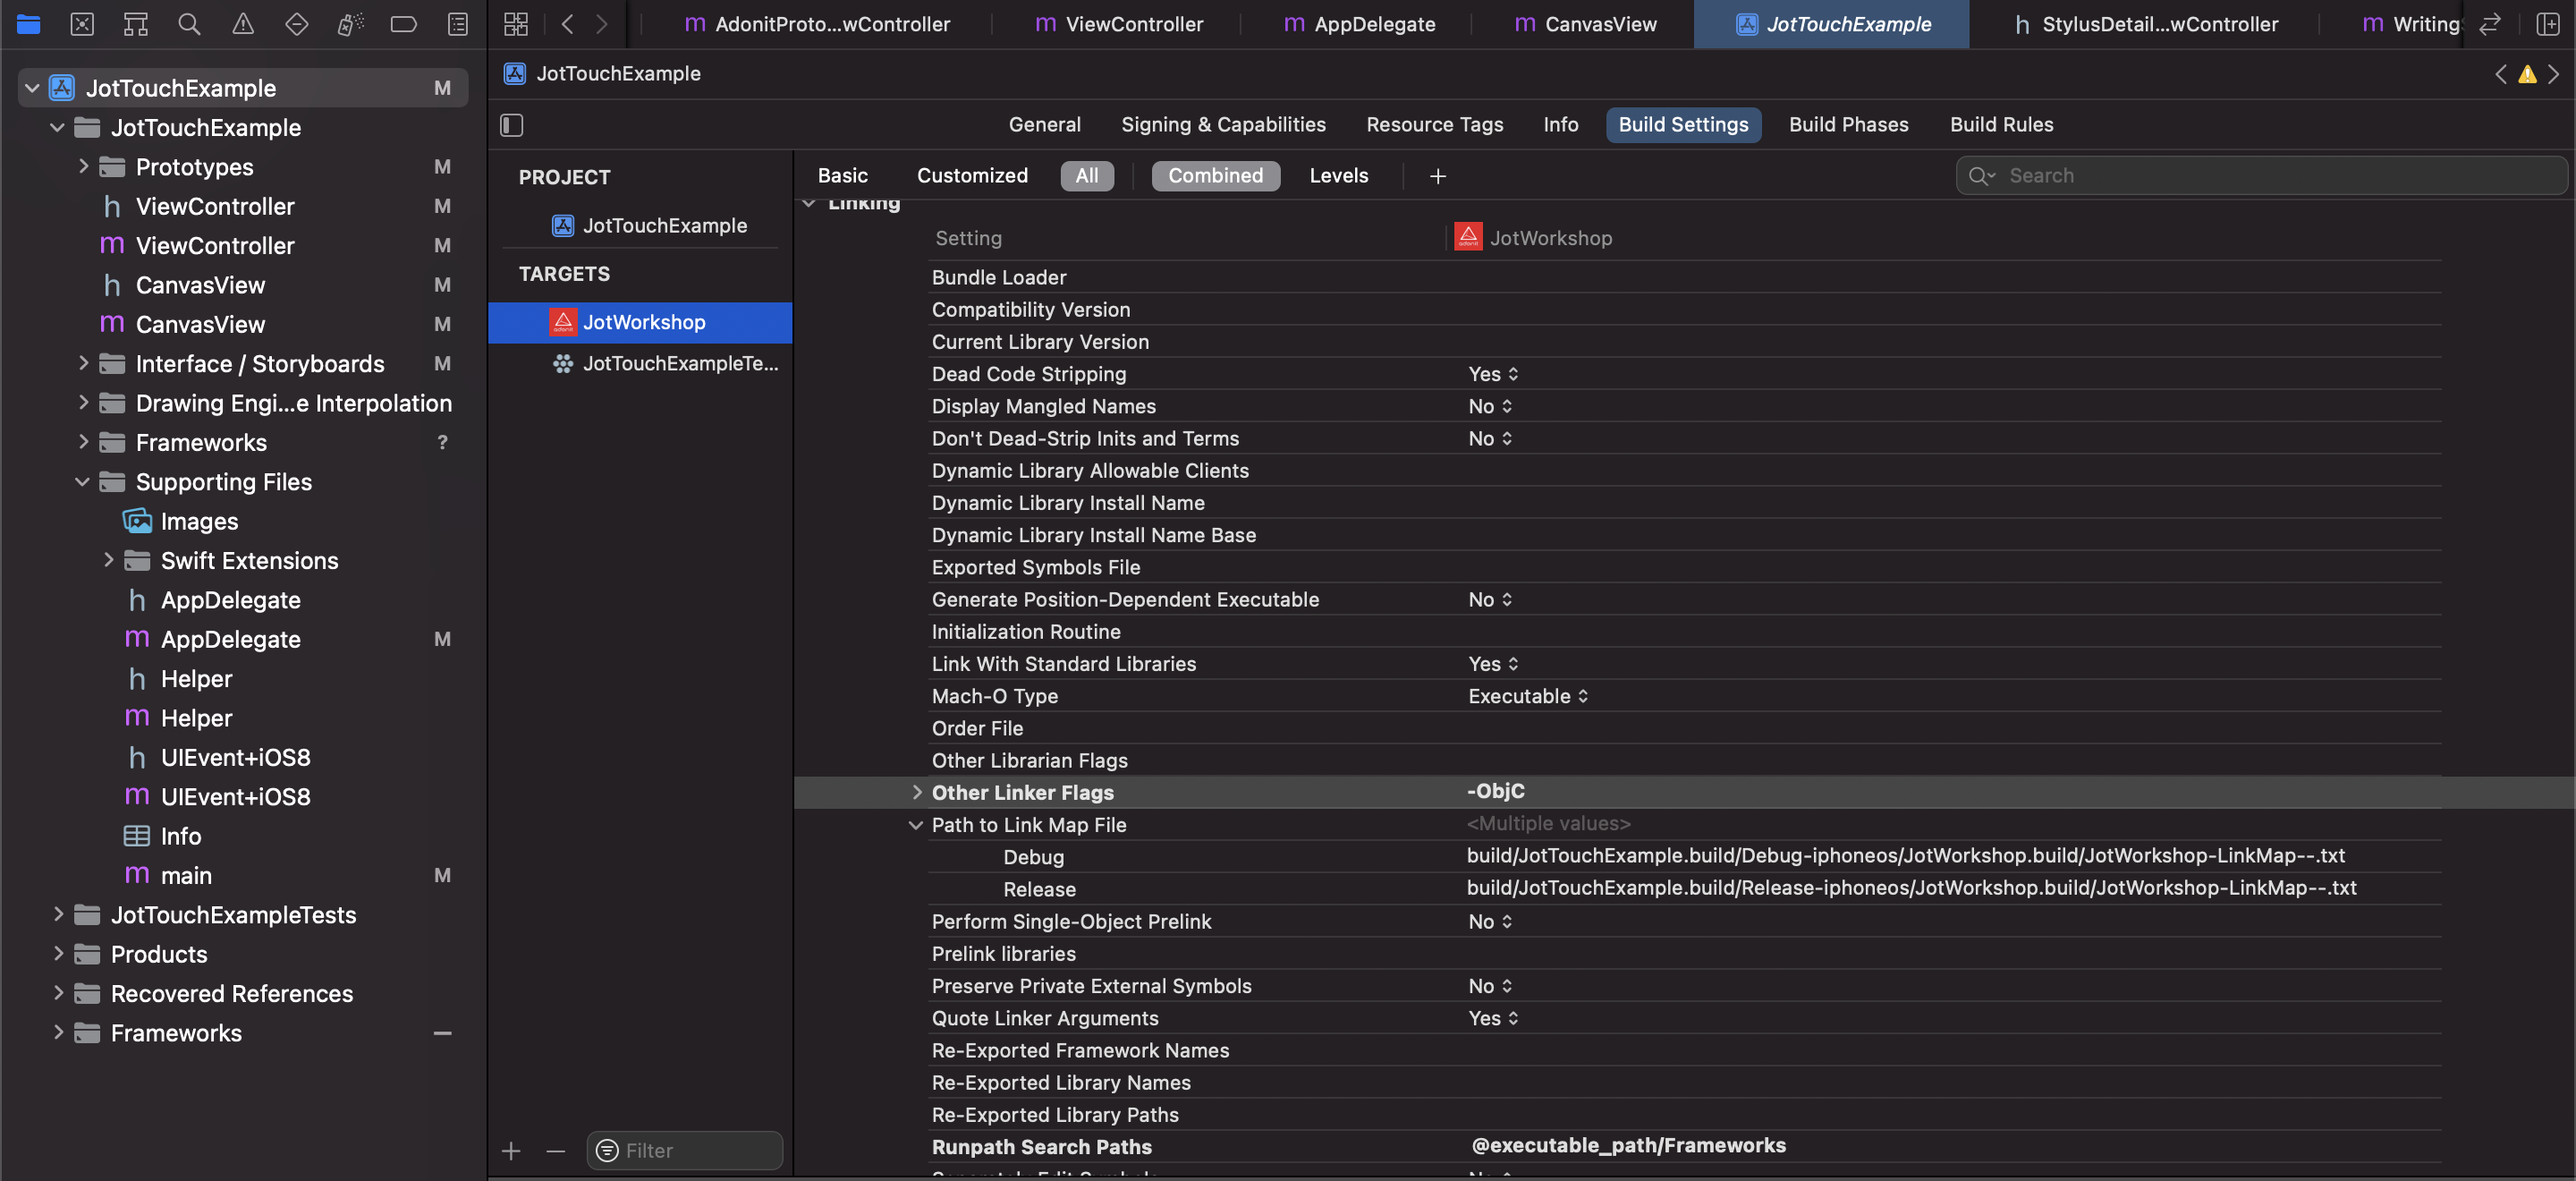
Add two additional Other Linker Flags (ObjC) as shown below.
-
Be sure to include the SDK’s header file wherever you wish to use it within your application like so
#import "AdonitSDK.h"
If you’ve already imported AdonitSDK.Framework, please change your header from
  #import <AdonitSDK/AdonitSDK.h> to #import "AdonitSDK.h"
If you're going to be using any part of the SDK's Connection and Settings UI, you'll also need to import the SDK's bundle into your application.
-
Select your Project in the Project Navigator and then choose Add Files to…

-
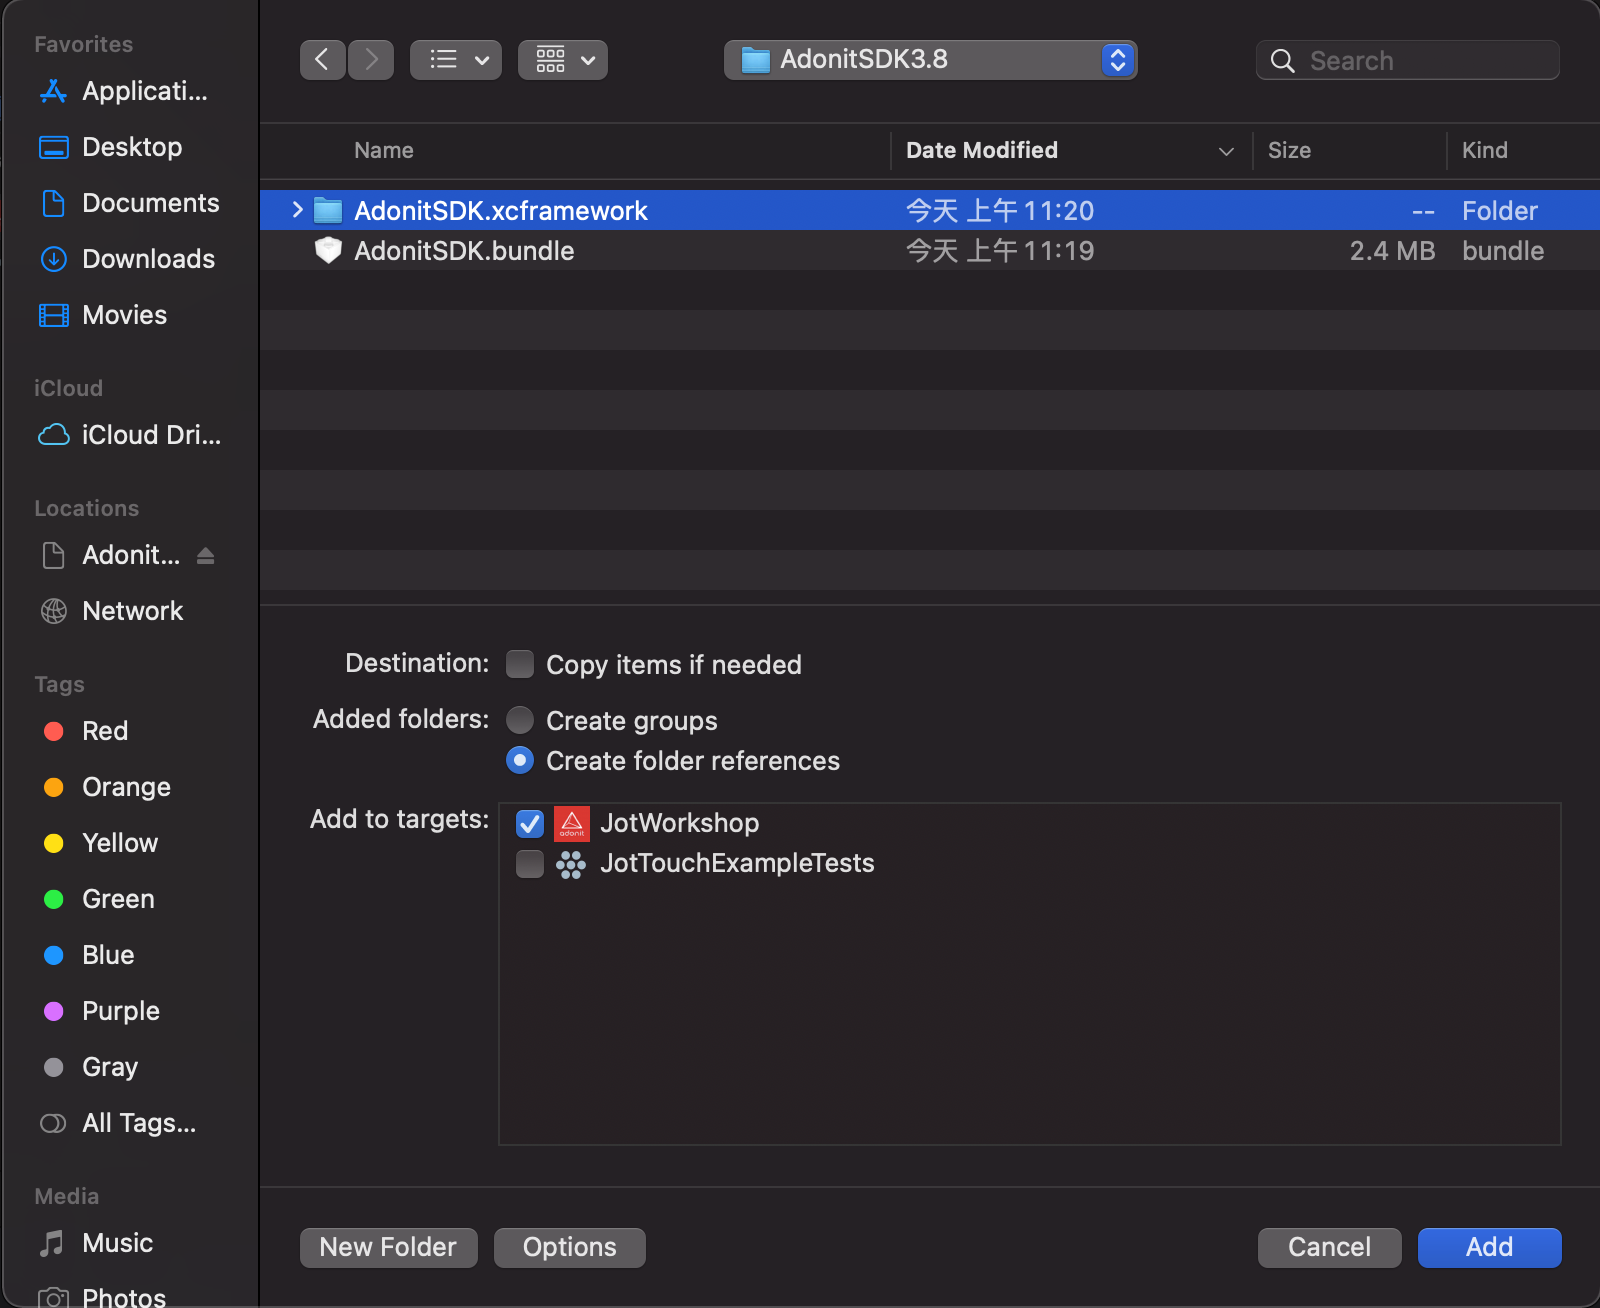
Select the SDK's bundle. Make sure Copy Items if needed is checked. Then click Add.
-
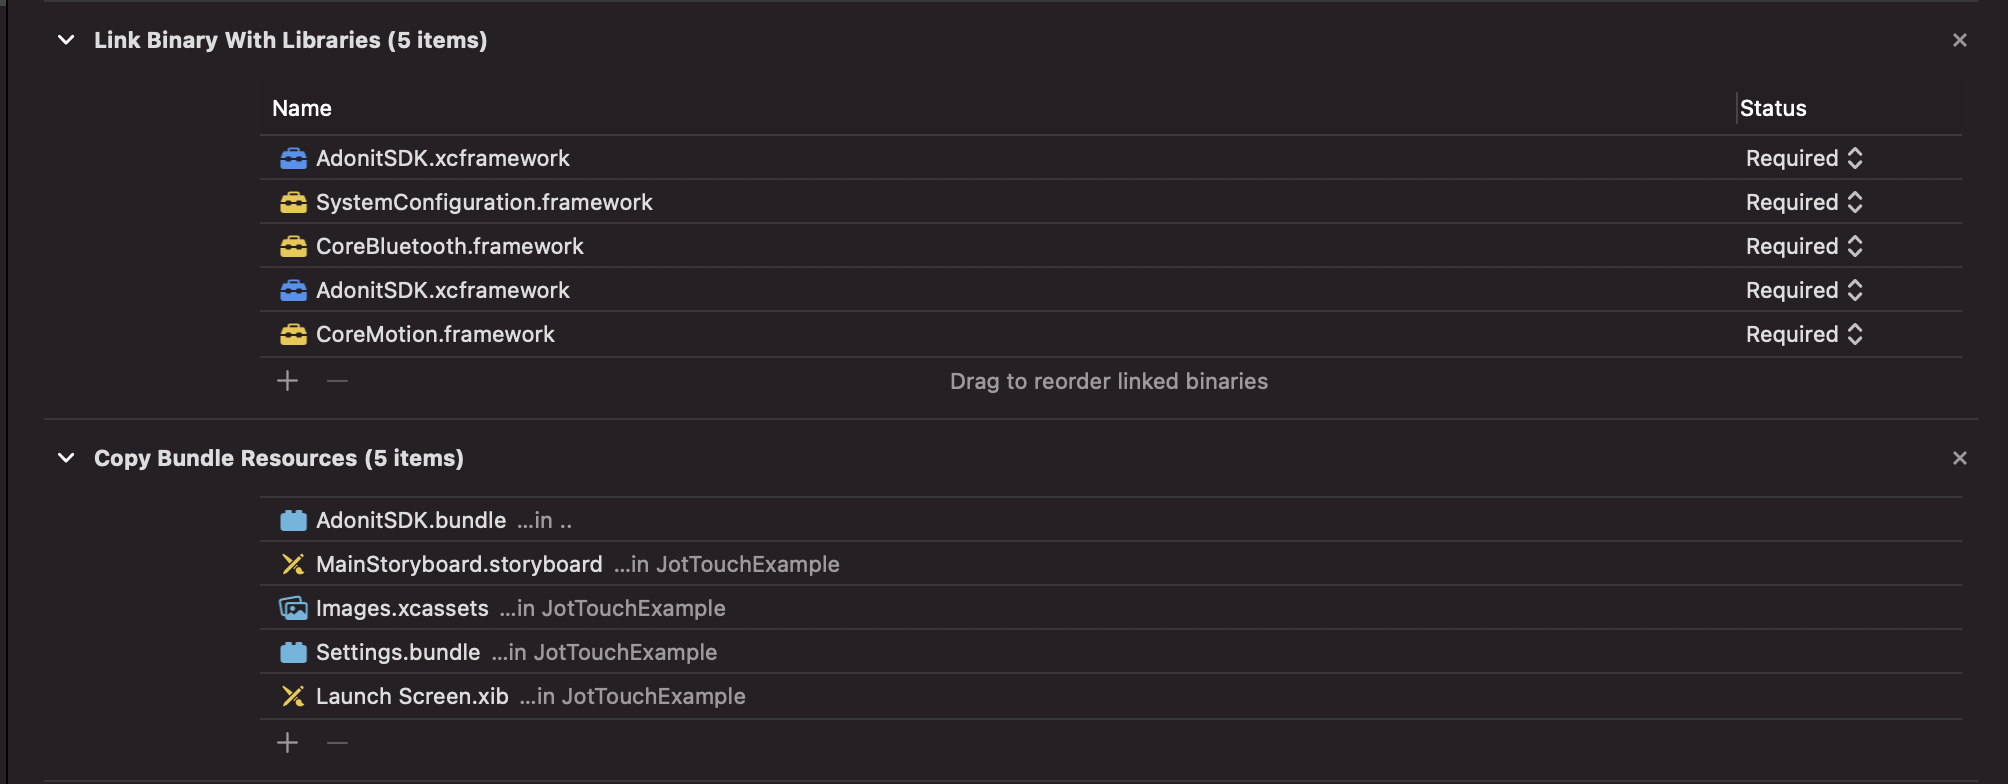
The bundle should now appear under the Copy Bundle Resources build step.
Copyright (c) 2021 Adonit. All rights reserved.